“It is never too late to learn”. You know I am late to this experiment. Because people already implemented that. If you have a little bit knowledge of javascript or jquery you can easily create an app for google chrome web store. Web chrome store provides facility to peoples can upload their extensions & publish it publicly. Due to this chrome user have the chance to taste different types of app recipe. One week an ago I was working on an extension at this time I learned about the chrome extension development same thing I share with you.
File Structure
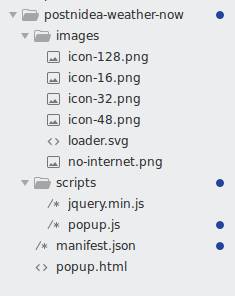
Before starting anything let me show you the structure of the extension
You can also directly browse my repository by using link https://github.com/rakeshkumar125/postnidea-weather-now
Header Information
Let me first explain the manifest.json file.
You can see the name, version, description is the fields that contain identification information.
Permission field contains the name of the fields for which you extension need permission to modify or access. Right now I have added only a single one storage but you can allow permission to other fields according to your needs. You can get more information using link
Icons are the field which contains the set of images which shows for the chrome extension logo on a different resolution.
“homepage_url” is the field which contains the publisher or developer website URL so that end user can get the information.
“browser_action” field contains the list of resources that will be called when the user performs the action on the browser like click on the chrome extension etc. In my case, it contains the “default_popup” field in which I have defined the name of the file which is called when the user clicks on the chrome extension logo. “default_icon” field which contains images for different resolutions.
“manifest_version” is the field which contains the version of the manifest file.
Look & Feel or Client side design
Now let me start explanation another important file popup.html
In above you can see that I have added the HTML part of the extension which is shown when user click on the icon then the user will see the popup content. In the head, I have added two scripts files “jquery.min.js” and “popup.js”. The “jquery.min.js” is the library file which supports for the javascript with the help of that I can user jquery in the extension.
After that, you can see the body part you can see I have added the DIV with id “weather-report”. Initially, it has shown with loading image once data fetched from API then it’s loaded with the report.
Implement Extension Logic
Last but not least file “popup.js”. You can see the code is below.
You can see the I first checked that user is connected with the internet or not by using function “navigator.onLine”. If the user is online then start preparing the weather report otherwise it will just show the message for connecting to the internet.
If the user connects with internet then I got the current use latitude and longitude of the user by the API (https://ipv6.ip.nf/me.json) which is free. Once I got the user latitude and longitude then Trigger another API (api.openweathermap.org) for weather report which is also free. After getting weather JSON data then I create HTML using function “getReportHTML”.
Finally, load the report to the popup.
You can also check out above explanation using video.
You can also enjoy live demo by clicking on below URL
https://chrome.google.com/webstore/detail/postnidea-weather-now/jiapbdoeogpgpeggldgdhcdalhdchgae
If you have any query or suggestions you can share by comment.

